FeeJee Mermaid in 5 Days, Prop Build Project Day 1
This 5 day tutorial was originally released on the blog of one of my previous business ventures 'Pyewackette and Pecke'. It was a dark cousin of Etsy, a site dedicated to hunting down the best alternative artists and collectors and providing them with a platform to showcase their dark talents and products. The project folded due to high demand for my own personal work so rather than spread myself too thinly I decided to focus my creative efforts here.
I have received a huge amount of e-mails requesting the tutorial to be republished so here it is. Enjoy me hearties arrrgh!
Unlike other artists I know, I work best under pressure and within time constraints however, I’ve not left this project to the last minute by choice. It’s been so busy here at Pyewackett HQ that I’ve merely lost track of the hours, days and weeks and possibly even the year! Anyway, next Saturday is the Alternative Market in Derby hosted by Curiouser & Curiouser and I was planning a nice big centre piece for my display, namely a FeeJee Mermaid. One thing has led to another and as you may have guessed I’ve not even started so I had an idea...
Over the next few days I will be posting a daily blog on the build of the mermaid. It needs to be complete and ready to ship to Derby on Friday so it’s going to be tight! I’ve made many bizarre props and creatures over the years but never a FeeJee Mermaid so I will be pulling together a whole host of building methods, techniques and idea I’ve never realised to hopefully create something worth displaying this coming Saturday.
Not enough people in the prop building community share their ideas which is a shame. Some people guard their techniques like Smaug sat on his hoard of Dwarven gold. If we don’t share then our precious methods die with us. As Adam Savage mentioned at MakerFaire 2014 – no secrets!
In his own wise words -
"nobody is going to take your technique and then steal your ideas, nobody has a monopoly on being you and if you think that your technique is what makes you interesting you’re being ridiculous, so share your techniques! When you share an idea, somebody may come back to you with a better way of doing it and you’re going to learn something from them and develop your own techniques even further."
So, I’m going to cover what I do right here. If you want to try it for yourself and go for it, if you know a better way of doing something let me know! Either way sharing, experimenting and learning is what prop building is all about, so through my blogs and workshops I hope to promote that way of thinking.
Right, let’s get to it…
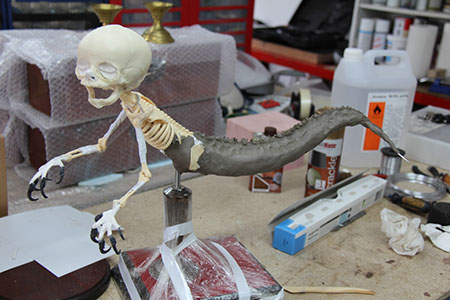
Here's what I've achieved at the end of day 1. We'll then look at what I did to get this far and any challenges faced....
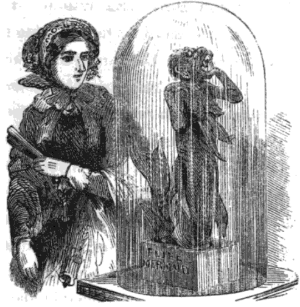
I wanted my mermaid to be true to the original size which is about half a metre in length, I also had to consider mounting options at I did not have a display case or dome in stock.
The mermaid is built around an 18” medical skeleton model, a resin cast of a human infant skull and tail made from armature wire, tin foil and air dry clay.
Hands
In the past I have had to source real magpie or crow feet to obtain claws for fingers. Thankfully I can now just 3D print a bird’s foot, claws n’all without harming a single creature. I use the Up Plus 2 printer and using black ABS filament I printed 4 sets of Osprey feet. To get the shiny claw finish I brushed each foot with pure acetone. This also smooths out any imperfections and bumps let over from the printing process.

Each printed toe and claw was then snipped and attached to a wire hand armature. As mentioned before, I like to make the skeletons of the creatures I make fully poseable so that I can mess with the dynamic posing before any other materials are applied.

The hand shape was filled out with white Milliput and the original skeleton hand was replaced with the new larger clawed mermaid hand.

Skeleton
As I discovered from my mummified fairy hoax, then best way to replicate a corpse if to use a realistic skeleton to drape you skin over. Don’t bother making your own, just an ‘off the shelf’ school biology model will do. You just need to make it poseable. I just deconstruct the skeleton, removing all screws etc and rearticulate it with armature wire and tape. To bend the spine into position I just heat it with a heat gun, bend to the desired position and then immerse in cold water to set it.

The signature feature on a FeeJee Mermaid is the oversized freaky head. I removed the standard skull from the skeleton and cast an infant skull in resin. I then modelled a nose and closed eyes with Milliput. The ears will go on later.

After a lower jaw section was cast and attached, the head was then screwed to the articulated skeleton. The upper torso is now starting to take shape and the over sized head and hands already give the FeeJee mermaid that signature look.

Tail
I’ve never tackled a fish tail before (excuse the pun) so this was new territory for me. To gauge the desired length I cut a large piece or armature wire, twisted one end around the pelvis of the skeleton and then cut to what looked like the right length for a mermaid’s tail.


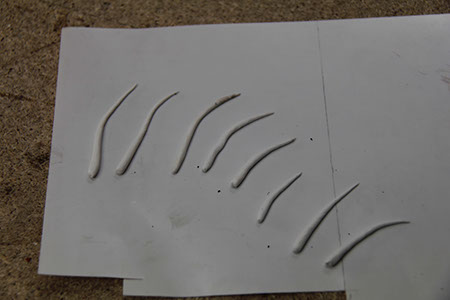
With the remaining Milliput left over from the hands and face I rolled a number of spines that I will use later to model a dorsal fin.
A rough tail shape was then modeled with tin foil wrapped around the wire. Tin foil was also packed into the rib cage cavity and and abdominal area to give additional strength and to act as a key for later applications of modeling material to grip to.

Base
At this stage I needed a base. This would allow me to handle the mermaid safely, dynamically pose the skeleton and allow it to dry without any contact with surfaces which may crumple or alter the position.
The studio is full of remnants of old projects and bits that I keep in hope they may come in handy one day. I had a nice large and heavy diorama base from an aborted Golden Demon Awards project so I roughed it up on the belt sander and gave it a quick dusting with 2-part crackle paint. A red velvet baize was then fitted.
To mount the mermaid I took an antique wooden candle stick and dismantled it. I then drilled a hole in the plinth and screwed the candle stick to it.

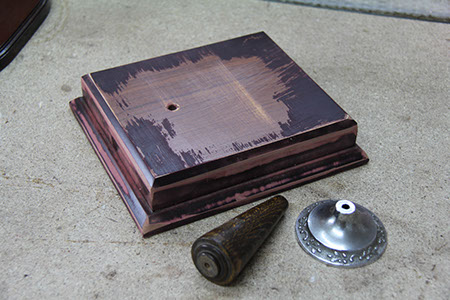
A steel rod was fitted into the rib cage of the mermaid and a hole was drilled into the top of the candle stick allowing the mermaid to be mounted securely but also removable.


Tail Part 2
Once the mermaid was securely mounted I could continue modelling the tail. This was done with air dry clay, not everyone’s favourite material but it allows me to sculpt what I want quickly. It does crack when it dries however, I will cover what I do to get around this on Wednesday when it will hopefully be dry.


I continued the vertebrae from the upper torso and down the fish tail and added some rough texture. Most of this will be covered over the next few days with layers of latex and plaster so a neat finish is not important.
As you can see from the image above, the base has been wrapped and taped to protect over the coming days.
The main aim of today was to complete the foundations of the mermaid figure and get it mounted. I'm hoping the clay will dry by Wednesday morning at the latest although I have bought the mermaid into the house in the hope of speeding up the drying process. Depending on how she does over night will dictate what I cover tomorrow!