Home>Home Appliances>Kitchen Appliances>How To Make A Solar Dehydrator
Kitchen Appliances
How To Make A Solar Dehydrator
Modified: January 23, 2024
Learn how to make a solar dehydrator for preserving food at home. Discover eco-friendly kitchen appliances for sustainable living.
(Many of the links in this article redirect to a specific reviewed product. Your purchase of these products through affiliate links helps to generate commission for Storables.com, at no extra cost. Learn more)
Introduction
Are you looking for a sustainable and cost-effective way to preserve your fruits, vegetables, and herbs? Look no further than a solar dehydrator! This ingenious device harnesses the power of the sun to gently remove moisture from food, effectively extending its shelf life while retaining essential nutrients and flavors.
In this comprehensive guide, we will walk you through the process of building and using your very own solar dehydrator. Whether you're a homesteader, a gardening enthusiast, or simply someone who wants to reduce food waste and enjoy home-dried treats, this DIY project is perfect for you.
By utilizing readily available materials and the sun's natural energy, you can create a sustainable alternative to electric food dehydrators. Not only will you be reducing your carbon footprint, but you'll also be saving money in the long run. Plus, there's something incredibly satisfying about crafting your own food preservation solution from scratch.
So, roll up your sleeves, gather your tools, and let's embark on this rewarding journey to create a solar dehydrator that will serve you well for years to come. Get ready to bask in the sun's rays while producing delicious, nutrient-dense dried foods for your pantry and snacking pleasure.
Key Takeaways:
- Embrace the sun’s energy to create a sustainable and cost-effective solar dehydrator, preserving fruits and vegetables while reducing food waste and enjoying flavorful, homemade dried treats.
- Construct a solar dehydrator using simple materials and the power of the sun, unlocking a world of culinary possibilities and contributing to a more sustainable and flavorful world.
Read more: How To Make Yogurt In A Dehydrator
Materials Needed
Before diving into the construction of your solar dehydrator, it’s essential to gather the necessary materials. Many of these items can be found at your local hardware store or repurposed from existing supplies, making this project both eco-friendly and budget-conscious. Here’s what you’ll need:
- 1. A sturdy wooden or metal frame: This will serve as the foundation of your solar dehydrator. Consider using weather-resistant materials to ensure durability.
- 2. Transparent plastic sheeting or Plexiglas: This will form the top of the dehydrator, allowing sunlight to enter while trapping heat inside.
- 3. Black paint or matte black aluminum foil: This will be used to create a solar absorber, maximizing the absorption of sunlight and heat within the dehydrator.
- 4. Drying racks: These can be made from wooden slats or wire mesh, providing ample space for your fruits, vegetables, and herbs to dry evenly.
- 5. Hinges and screws: These will be used to secure the top panel and allow for easy access to the interior of the dehydrator.
- 6. Ventilation materials: Consider using small vents or adjustable openings to regulate airflow and prevent overheating.
- 7. Basic carpentry tools: Including a saw, drill, screws, and measuring tape to assemble the frame and attach components.
- 8. Optional: Thermometer and hygrometer: These instruments can help you monitor the temperature and humidity levels inside the dehydrator, ensuring optimal drying conditions.
With these materials in hand, you’ll be well-equipped to construct a functional and efficient solar dehydrator. Now, let’s move on to the exciting process of building the frame and bringing your dehydrator to life.
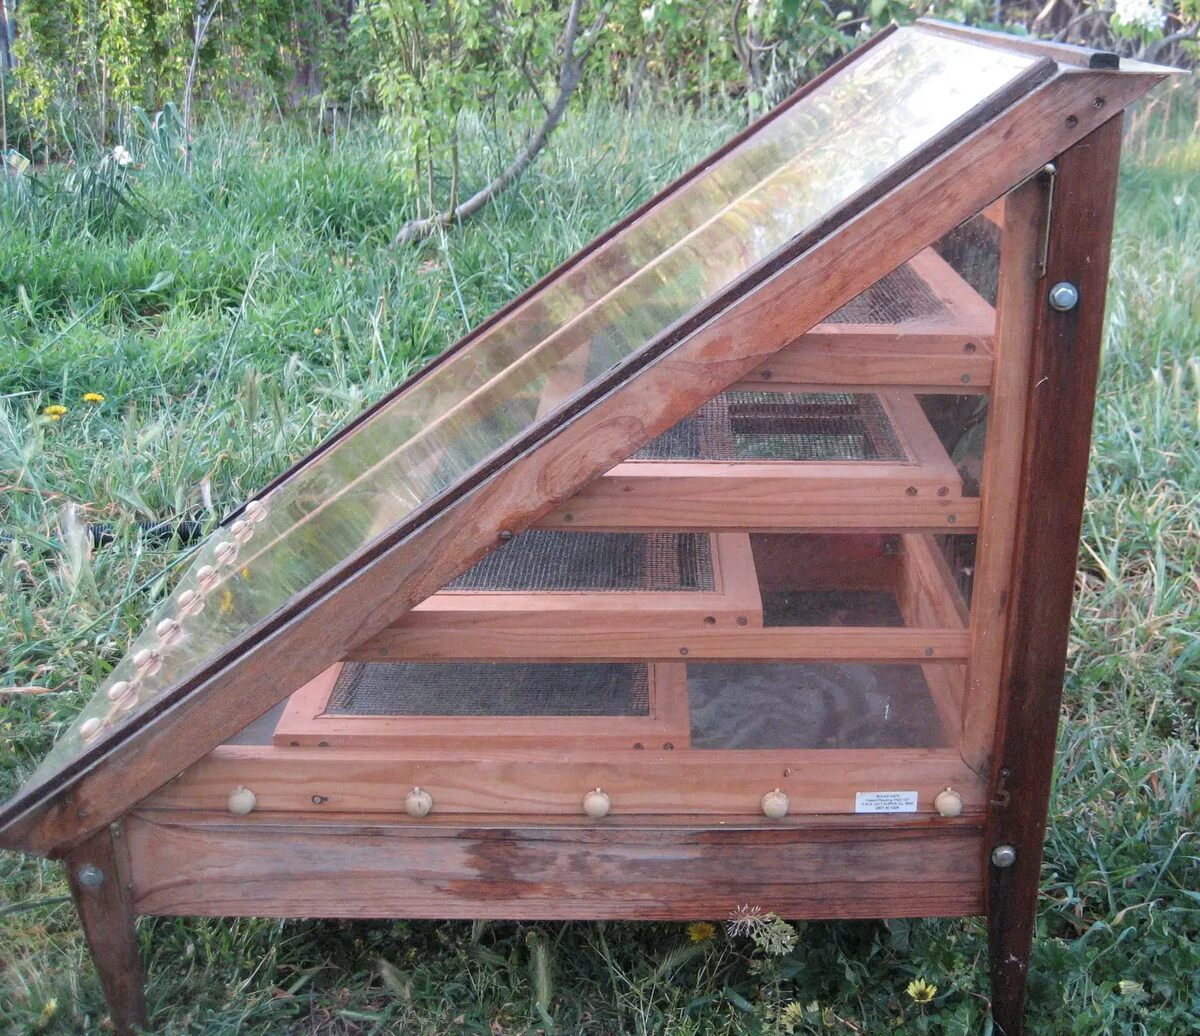
Building the Frame
The foundation of your solar dehydrator is its frame, which provides structural support and stability. When constructing the frame, it’s crucial to ensure that it is sturdy, durable, and able to withstand outdoor conditions. Here’s a step-by-step guide to building the frame:
- Choose Your Material: Select a material for the frame that can withstand exposure to sunlight, moisture, and temperature changes. Pressure-treated lumber or rust-resistant metal are excellent choices for outdoor durability.
- Measure and Cut: Using a saw, carefully measure and cut the material into pieces according to your desired dehydrator size. Consider the available space in your yard or garden where the dehydrator will be placed.
- Assemble the Base: Begin by constructing the base of the frame, ensuring that it is level and stable. This will provide a solid platform for the rest of the dehydrator components.
- Build the Walls: Using additional pieces of the chosen material, construct the walls of the frame. These walls will support the top panel and provide the enclosure for the drying racks and solar absorber.
- Secure the Corners: Use screws or appropriate fasteners to secure the corners of the frame, ensuring that the structure is rigid and able to withstand outdoor elements.
- Prepare for the Top Panel: Leave an opening at one end of the frame to accommodate the transparent top panel. This opening will allow for easy access to the interior of the dehydrator.
By following these steps, you’ll create a robust and well-constructed frame for your solar dehydrator. Once the frame is in place, you can proceed to the next phase of the construction process: attaching the solar absorber to harness the sun’s energy for efficient food drying.
Attaching the Solar Absorber
The solar absorber is a critical component of your dehydrator, responsible for capturing and retaining the sun’s heat to facilitate the drying process. By applying a dark, heat-absorbing material to a surface within the dehydrator, you can maximize the conversion of sunlight into thermal energy. Here’s how to attach the solar absorber to your dehydrator:
- Prepare the Surface: Choose a suitable area within the dehydrator’s frame to apply the solar absorber. This area should receive direct sunlight and have ample space for the absorber material.
- Apply the Absorber Material: Using black paint or matte black aluminum foil, coat the chosen surface with the heat-absorbing material. Ensure that the application is even and covers the entire area to maximize heat absorption.
- Secure the Absorber: Use adhesive or fasteners to secure the absorber material to the chosen surface, preventing it from shifting or detaching during use. This will ensure consistent heat absorption and distribution.
- Optimize Absorption: Position the absorber in a way that maximizes its exposure to direct sunlight. Consider the angle of the sun throughout the day and adjust the orientation of the dehydrator as needed to capture the most sunlight.
- Monitor Performance: Once the absorber is in place, observe its performance on sunny days, taking note of the temperature increase within the dehydrator. This will help you optimize the positioning and efficiency of the absorber.
By following these steps, you’ll effectively harness the sun’s energy to create a warm and conducive environment for drying your fruits, vegetables, and herbs. With the solar absorber in place, your dehydrator is well on its way to becoming a sustainable and efficient food preservation solution.
When building a solar dehydrator, make sure to use materials that are durable and can withstand outdoor conditions, such as weather-resistant wood or metal.
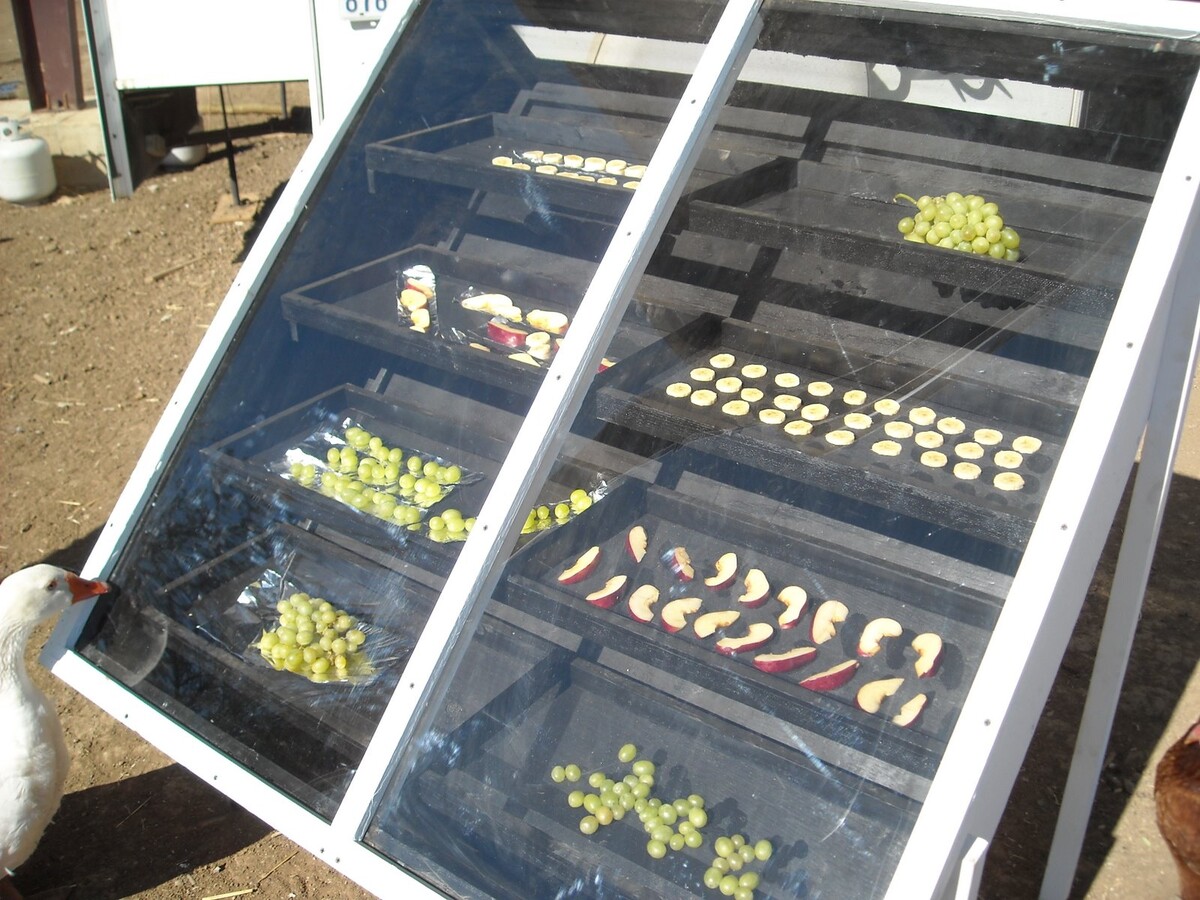
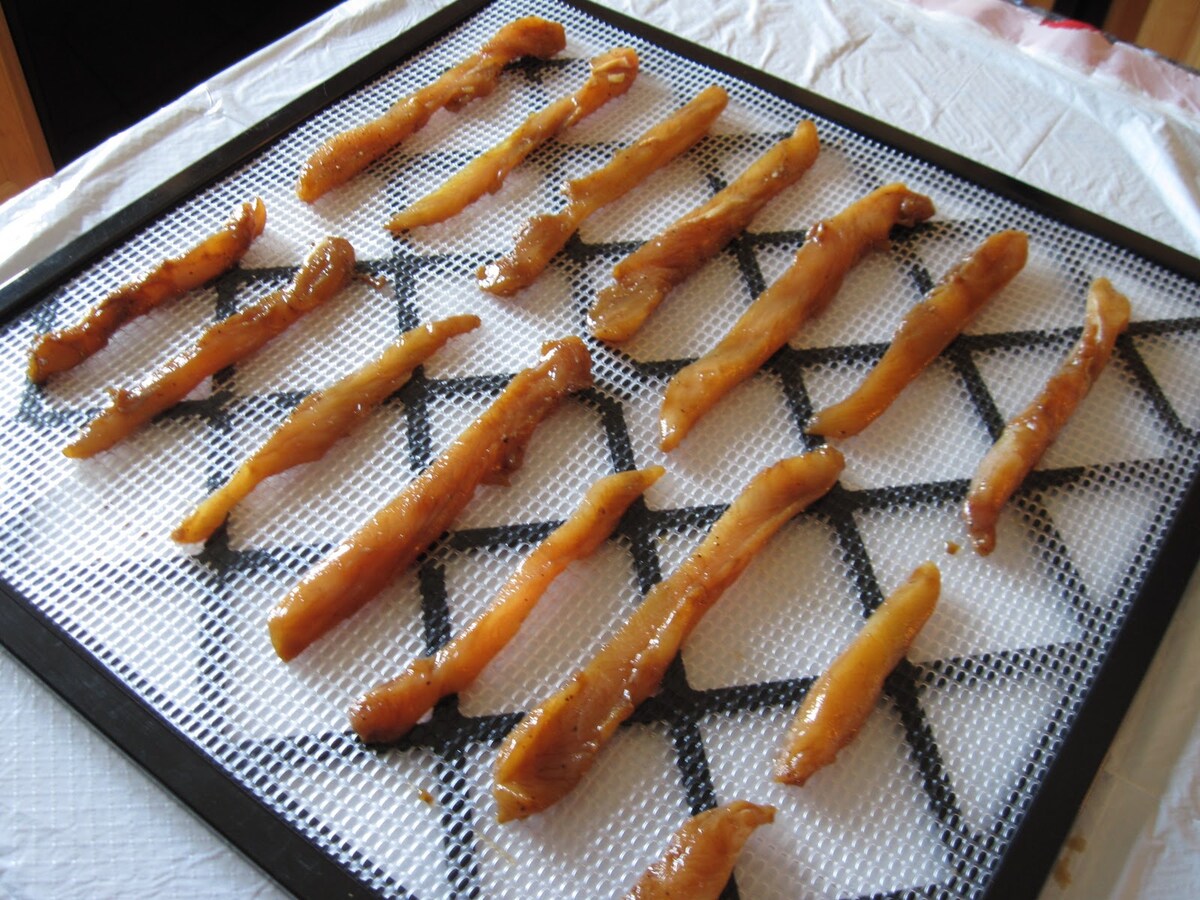
Adding the Drying Racks
Once the frame and solar absorber are in place, it’s time to incorporate the drying racks into your solar dehydrator. These racks provide the necessary surface area for your fruits, vegetables, and herbs to be evenly exposed to the warm, circulating air, allowing for thorough and efficient drying. Here’s how to add the drying racks to your dehydrator:
- Measure the Interior: Take precise measurements of the interior dimensions of your dehydrator to determine the size and number of drying racks needed. This will ensure a proper fit and optimal use of space.
- Construct the Racks: Using wooden slats, wire mesh, or food-grade plastic mesh, build the drying racks to fit within the dehydrator. Ensure that the material is food-safe and able to support the weight of the produce without sagging.
- Allow for Airflow: Space the drying racks evenly within the dehydrator, allowing sufficient room between each rack to promote airflow. Adequate airflow is crucial for consistent drying results.
- Secure the Racks: Use appropriate fasteners or supports to secure the drying racks in place, preventing them from shifting or collapsing when loaded with produce. Stability is key to successful and safe drying.
- Optimize Placement: Position the drying racks to take full advantage of the warm air circulating from the solar absorber. This may involve arranging the racks to ensure even exposure to the heated air.
- Test the Configuration: Before loading the dehydrator with food, run a test cycle to ensure that the racks are secure and that air circulates freely around them. This will help identify any adjustments needed before actual use.
With the drying racks in place, your solar dehydrator is now equipped to accommodate an array of fresh produce for gentle and effective drying. The addition of these racks marks a significant step toward harnessing the sun’s energy to create delicious, homemade dried foods.
Read more: How To Make Biltong With A Dehydrator
Ventilation and Airflow
Proper ventilation and airflow are essential elements of a well-functioning solar dehydrator. By facilitating the circulation of warm, dry air, you can achieve consistent and efficient drying results while preventing moisture buildup that can lead to spoilage. Here’s how to optimize ventilation and airflow within your dehydrator:
- Strategic Vent Placement: Determine the placement of vents or openings within the dehydrator to allow for the intake of fresh air and the expulsion of moist air. These vents should be positioned to encourage a natural flow of air throughout the interior.
- Size and Quantity: Consider the size and number of vents needed based on the dimensions of your dehydrator. Aim for a balanced airflow that promotes even drying across all racks.
- Adjustable Ventilation: Incorporate adjustable vents or flaps that can be opened or closed to regulate the airflow and temperature within the dehydrator. This flexibility allows for fine-tuning the drying conditions based on the specific requirements of the food being processed.
- Preventing Pests: Install mesh or screens over the vents to prevent insects or debris from entering the dehydrator while still allowing air to flow freely. This protective measure ensures that your dried foods remain uncontaminated.
- Natural Convection: Leverage the principles of natural convection to encourage the upward movement of warm air within the dehydrator. This can be achieved by positioning vents at the base and top of the dehydrator to create a natural airflow pattern.
- Monitoring Airflow: Regularly observe the airflow patterns within the dehydrator to ensure that all areas receive adequate ventilation. Adjust the positioning and operation of vents as needed to maintain optimal drying conditions.
By prioritizing ventilation and airflow, you’ll create an environment within your solar dehydrator that promotes efficient and consistent drying, resulting in high-quality preserved foods that retain their nutritional value and flavor. With these measures in place, your dehydrator is poised to deliver exceptional drying performance while utilizing the sun’s renewable energy.
Using the Solar Dehydrator
Now that your solar dehydrator is constructed and optimized for efficient drying, it’s time to put it to use and enjoy the benefits of preserving your favorite fruits, vegetables, and herbs. By following these simple steps, you can make the most of your solar dehydrator and produce delicious, home-dried treats:
- Prepare Your Produce: Wash and slice your fruits, vegetables, or herbs into uniform pieces to ensure consistent drying. Remove any blemishes or damaged areas before placing the produce on the drying racks.
- Load the Drying Racks: Arrange the prepared produce in a single layer on the drying racks, allowing ample space between pieces for proper airflow. Avoid overcrowding to promote even drying.
- Position in the Sun: Place the loaded solar dehydrator in a sunny, well-ventilated area, ensuring that it receives direct sunlight throughout the day. Adjust the orientation of the dehydrator as the sun moves to maintain optimal exposure.
- Monitor the Drying Process: Regularly check the progress of the drying produce, observing changes in texture and moisture content. Depending on the weather and produce type, drying times may vary.
- Rotate and Rearrange: Periodically rotate and rearrange the drying racks to promote uniform drying, especially if certain areas of the dehydrator receive more sunlight or airflow than others.
- Harvest and Store: Once the produce reaches the desired level of dryness, carefully remove it from the racks and allow it to cool. Store the dried foods in airtight containers in a cool, dark place to maintain their quality and shelf life.
With these straightforward steps, you can harness the power of the sun to transform your fresh produce into flavorful, shelf-stable snacks and ingredients. Embracing the art of solar dehydration allows you to savor the bounties of your garden or local market year-round, reducing food waste and embracing sustainable food preservation practices.
By incorporating the use of your solar dehydrator into your culinary endeavors, you’ll unlock a world of possibilities for creating wholesome, homemade dried foods that add a delightful touch to your meals and snacks.
Conclusion
Congratulations on successfully constructing your very own solar dehydrator! By harnessing the natural energy of the sun, you’ve embarked on a journey toward sustainable food preservation and culinary creativity. This eco-friendly and cost-effective approach to drying fruits, vegetables, and herbs not only reduces food waste but also empowers you to savor the flavors of each season throughout the year.
As you’ve discovered, the process of building and using a solar dehydrator is both rewarding and practical. By repurposing common materials and embracing the power of solar energy, you’ve created a valuable tool for preserving the harvest from your garden or local market. The gentle, sun-infused drying process retains the nutritional value and vibrant flavors of your favorite produce, allowing you to enjoy them in new and exciting ways.
Whether you’re crafting wholesome snacks, enhancing your culinary creations, or simply extending the lifespan of your garden’s bounty, your solar dehydrator is a testament to your commitment to sustainability and self-sufficiency. Embracing the art of solar dehydration not only enriches your kitchen endeavors but also contributes to a more environmentally conscious lifestyle.
As you continue to explore the possibilities of solar dehydration, consider experimenting with different fruits, vegetables, and herbs to discover unique flavor profiles and culinary uses. Share your dried creations with friends and family, and take pride in knowing that you’ve taken a meaningful step toward reducing food waste and embracing a more sustainable approach to food preservation.
With your solar dehydrator as a steadfast companion in your culinary pursuits, you’re poised to savor the sun’s energy in every delicious bite, all while contributing to a more sustainable and flavorful world.
Frequently Asked Questions about How To Make A Solar Dehydrator
Was this page helpful?
At Storables.com, we guarantee accurate and reliable information. Our content, validated by Expert Board Contributors, is crafted following stringent Editorial Policies. We're committed to providing you with well-researched, expert-backed insights for all your informational needs.


0 thoughts on “How To Make A Solar Dehydrator”