

Introduction: Arduino Leonardo/Micro As Game Controller/Joystick


IMPORTANT NOTE: This article is for Arduino IDE version 1.6.6 (or above). To add a USB Game Controller to an Arduino Leonardo or Micro using Arduino IDE version 1.6.5 (or below) see the following Instructable: Add USB Game Controller to Arduino Leonardo/Micro.
Out of the box the Arduino Leonardo and the Arduino Micro appear to the host computer as a generic keyboard and mouse. This article discusses how the Arduino Leonardo and the Arduino Micro can also appear as a generic Game Controller or Joystick. This project will only work with Arduino products based on the ATmega32u4 microcontroller (i.e. the Arduino Leonardo and the Arduino Micro). It will not work with the Arduino UNO, because it is based on the ATmega328 microcontroller.
The Arduino Joystick Library (a.k.a. Game Controller library) used in the Instructable provides the following:
- X, Y, and Z axis
- 32 buttons
- X, Y, and Z axis rotation
- Rudder
- Throttle
- 2 Point of View Hat Switches
Step 1: Installing the Library

The latest version of the Arduino library that allows the Arduino Leonardo and Micro to appear as a Game Controller can be downloaded from the following GitHub repository:
https://github.com/MHeironimus/ArduinoJoystickLibrary/tree/version-1.0
This GitHub repository actually contains three different versions of the Arduino Joystick Library:
- Joystick - Causes the Arduino to appear as single Game Controller
- Joystick2 - Causes the Arduino to appear as two, simple Game Controllers
- Joystick3 - Causes the Arduino to appear as three, simple Game Controllers
Copy the Joystick (and/or Joystick2 and/or Joystick3) folder from GitHub to the Arduino Libraries folder (typically located at %userprofile%\Documents\Arduino\libraries). The library (or libraries) should now appear in the Arduino IDE list of libraries.
Step 2: Running the Test Sketch

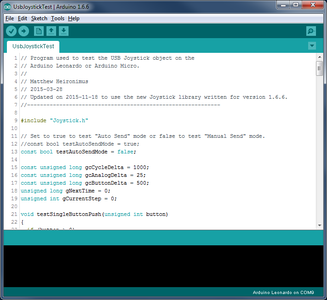
Included in the library is a test sketch, called UsbJoystickTest.ino (or UsbJoystick2Test.ino or UsbJoystick3Test.ino). This sketch should be loaded, compiled, and uploaded to the Arduino Leonardo or Micro using the Arduino IDE (version 1.6.6 or above).
The following steps are for Windows 7. If you have a different version of Windows or a different operating system, these steps may differ.
Step 3: Windows Control Panel - Hardware and Sound

Go to the Windows Control Panel and select “Hardware and Sound”.
Step 4: Devices and Printers

Then select “Devices and Printers”.
Step 5: Arduino Settings

- The Arduino Micro or Arduino Leonardo should appear in the list of devices.
- Right mouse click on the Arduino Leonardo or Arduino Micro to display the settings menu.
- Select “Game controller settings” to get to the “Game Controllers” dialog.
Step 6: Game Controller Settings

The Arduino Leonardo or Micro should appear in the list of installed game controllers. Select the Arduino Leonardo or Micro and click the Properties button to display the game controller test dialog.
Step 7: Test Using Game Controller Settings

While this dialog has focus, ground pin A0 on the Arduino to activate the test script. The test script will test the game controller functionality in the following order:
- 32 buttons
- throttle and rudder
- X and Y Axis
- Z Axis
- 2 Hat Switches
- X and Y Axis Rotation
Step 8: Another Simple Test
Once you have verified the Arduino Leonardo or Micro is working as a Game Controller, you can start creating your own Game Controller projects. The attached Arduino sketch file is a simple example that reads digital pins 9, 10, 11, and 12 and maps them to buttons 1, 2, 3, and 4 on the Game Controller.
Attachments

Step 9: Joystick Library API
Now that the Joystick library is available to the Arduino IDE, an Arduino Leonardo or Arduino Micro can be used for custom game controller projects. The following describes the complete Arduino Joystick Library API.
Joystick.begin(bool initAutoSendState)
Starts emulating a game controller connected to a computer. By default all methods update the game controller state immediately. If initAutoSendState is set to false, the Joystick.sendState method must be called to update the game controller state.
Joystick.end()
Stops the game controller emulation to a connected computer.
Joystick.setXAxis(byte value)
Sets the X axis value. Range -127 to 127 (0 is center).
Joystick.setYAxis(byte value)
Sets the Y axis value. Range -127 to 127 (0 is center).
Joystick.setZAxis(byte value)
Sets the Z axis value. Range -127 to 127 (0 is center).
Joystick.setXAxisRotation(int value)
Sets the X axis rotation value. Range 0° to 360°.
Joystick.setyAxisRotation(int value)
Sets the Y axis rotation value. Range 0° to 360°.
Joystick.setZAxisRotation(int value)
Sets the Z axis rotation value. Range 0° to 360°.
Joystick.setButton(byte button, byte value)
Sets the state (0 or 1) of the specified button (0 - 31). The button is the 0-based button number (i.e. button #1 is 0, button #2 is 1, etc.). The value is 1 if the button is pressed and 0 if the button is released.
Joystick.pressButton(byte button)
Press the indicated button (0 - 31). The button is the 0-based button number (i.e. button #1 is 0, button #2 is 1, etc.).
Joystick.releaseButton(byte button)
Release the indicated button (0 - 31). The button is the 0-based button number (i.e. button #1 is 0, button #2 is 1, etc.).
Joystick.setThrottle(byte value)
Sets the throttle value. Range 0 to 255.
Joystick.setRudder(byte value)
Sets the rudder value. Range 0 to 255.
Joystick.setHatSwitch(byte hatSwitch, int value)
Sets the value of the specified hat switch. The hatSwitch is 0-based (i.e. hat switch #1 is 0 and hat switch #2 is 1). The value is from 0° to 360°, but in 45° increments. Any value less than 45° will be rounded down (i.e. 44° is rounded down to 0°, 89° is rounded down to 45°, etc.). Set the value to -1 to release the hat switch.
Joystick.sendState()
Sends the updated joystick state to the host computer. Only needs to be called if AutoSendState is false (see Joystick.begin for more details).
Step 10: Additional Information
Additional information about this Arduino Joystick Library can be found on the following websites:
Arduino Joystick Library - http://mheironimus.blogspot.com/2015/11/arduino-joystick-library.html
GitHub [MHeironimus/ArduinoJoystickLibrary] - https://github.com/MHeironimus/ArduinoJoystickLibrary

Participated in the
Tech Contest


