Rosemary propagation from cuttings is an affordable and easy way of obtaining new plants. Instead of buying the new plant, just take cuttings from the old one, the mother plant, and transplant it in your garden. In this article, I am explaining how to root your rosemary cuttings in a simple way without using any rooting powder. Anyone can do it for almost no cost. All you need is just several cuttings (get them while pruning), water, a couple of plastic pots and bottles, some fruit mesh, and a rubber band. Instead of buying the new plants, just propagate your own.
Table of Contents
How to Grow Rosemary from Cuttings – Water Propagation, Rooting process
I am rooting now some rosemary cuttings that I picked this winter. I decided to go for water propagation as a method of rooting due to cold nights and night frost which will delay the ground rooting. I will keep cuttings indoors and transfer them in soil once roots are well developed which will be in 6 to 8 weeks. Here is a complete step by step guide with photos and video on how to do it:
Step 1: Select new shoots from the mother plant
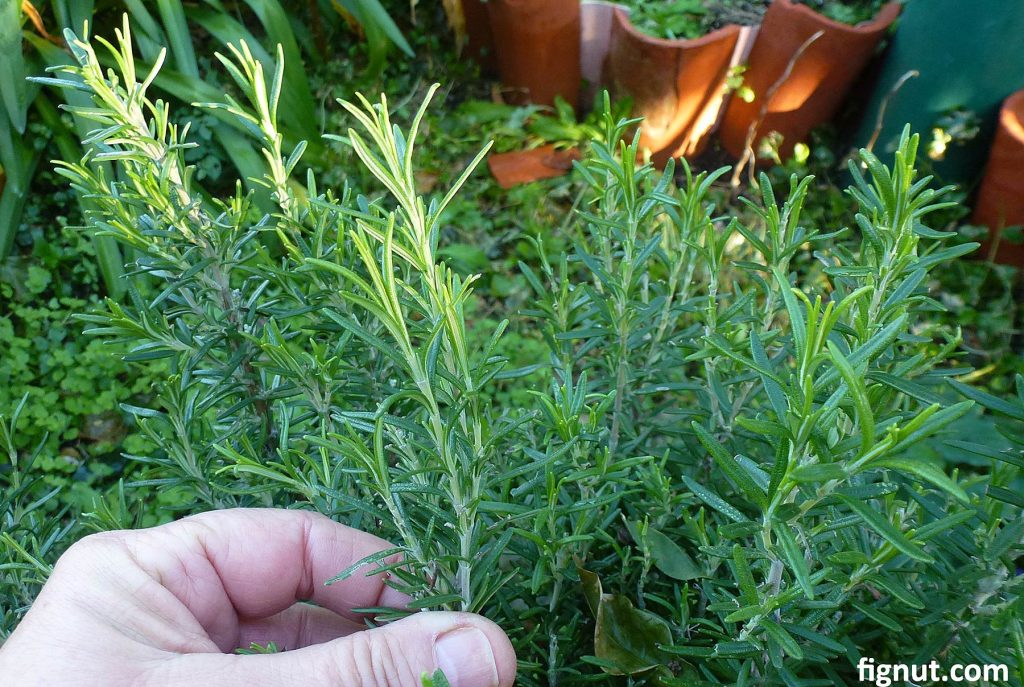
Select fresh grown, healthy stems at your mather plant. The younger, the better – you will recognize young shoots as they are much flexible than older ones and have green stems, as opposed to older ones that have brown, woody stems. See my rosemary plant young shoots in the above photo.
Step 2: Take stem cuttings
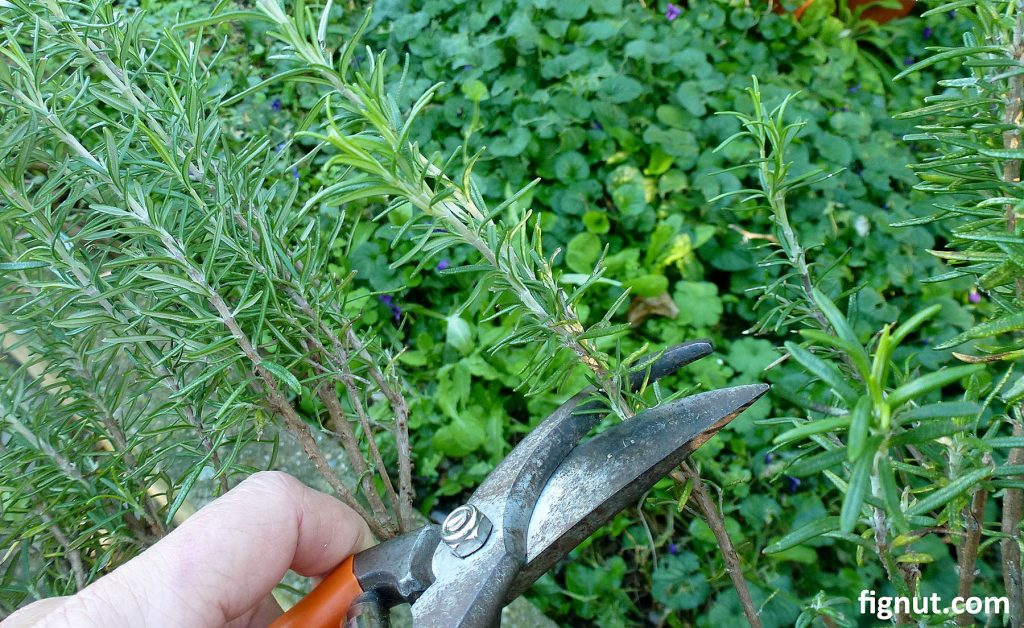
Use pruning scissors (or strong scissors) and take several cuttings that are about 12 to 15 cm long. Choose softwood stems as they propagate easier than hardwood stems as in the above photo. Take as twice as many stems (cuttings) as needed just in case some do not propagate.
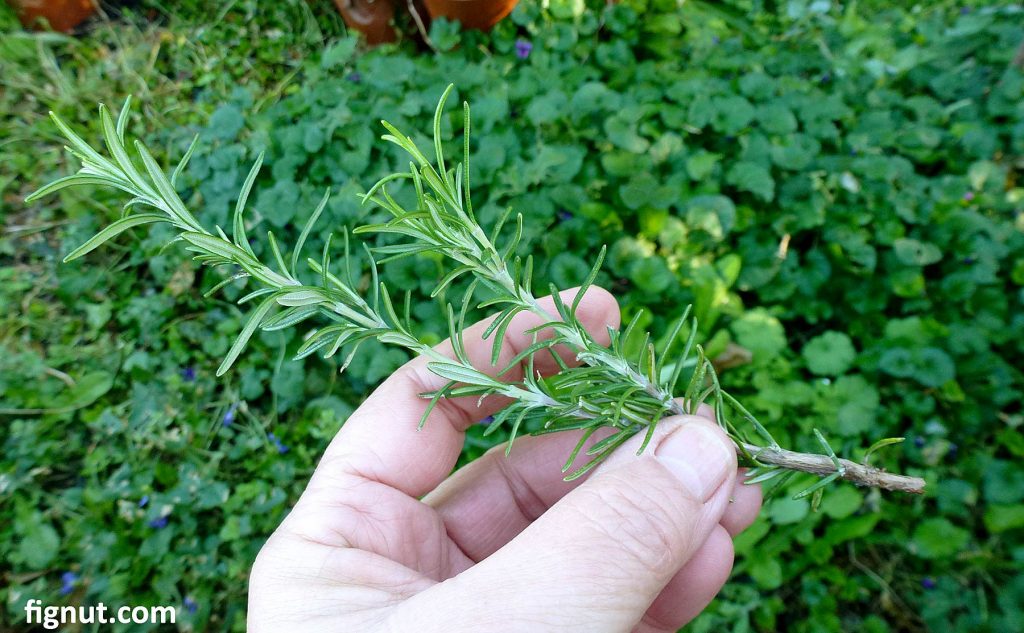
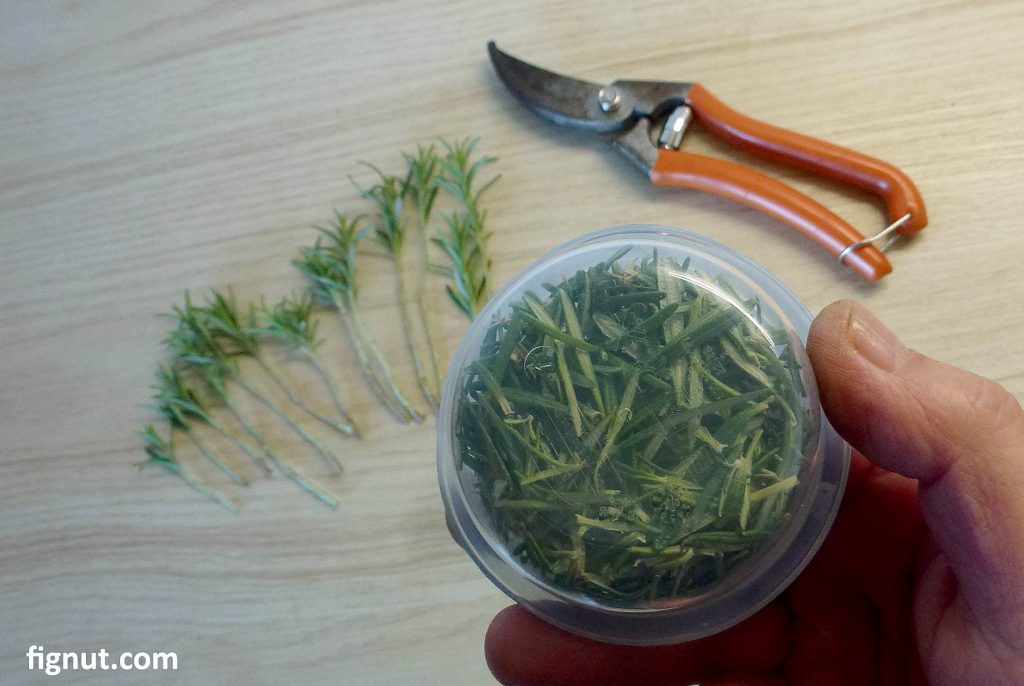
Step 3: Remove the lower leaves
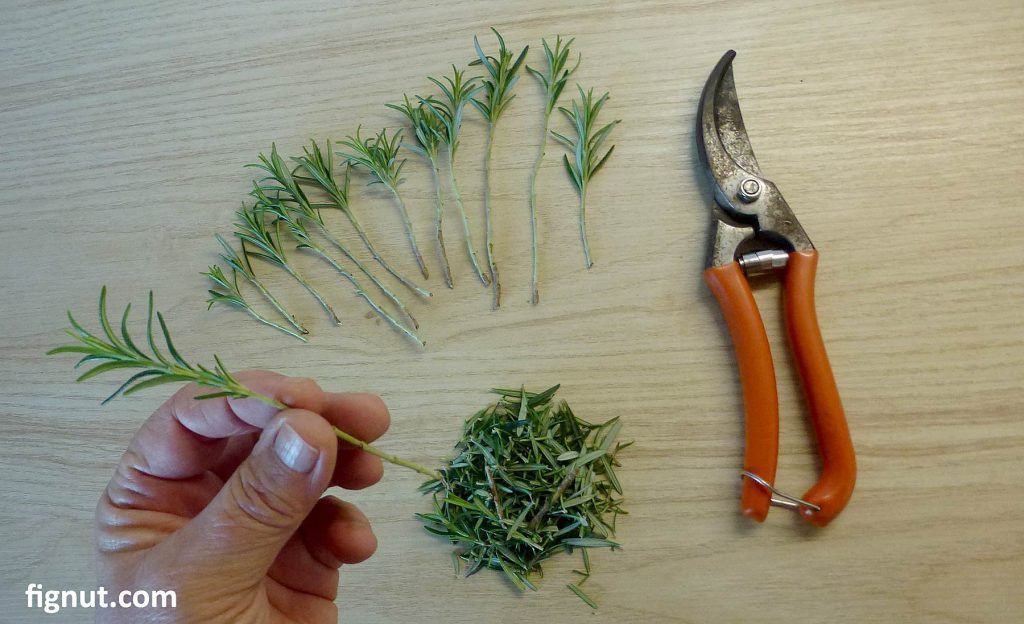
Carefully remove all leaves from the bottom two-thirds of the stems of the rosemary cutting as in the above photo and cut the bottom of stems at 45 degrees. Upon removing the lower leaves of rosemary stems, save them in a plastic container for later use (below photo)
Step 4: Press the bottom of the stem cutting to flatten
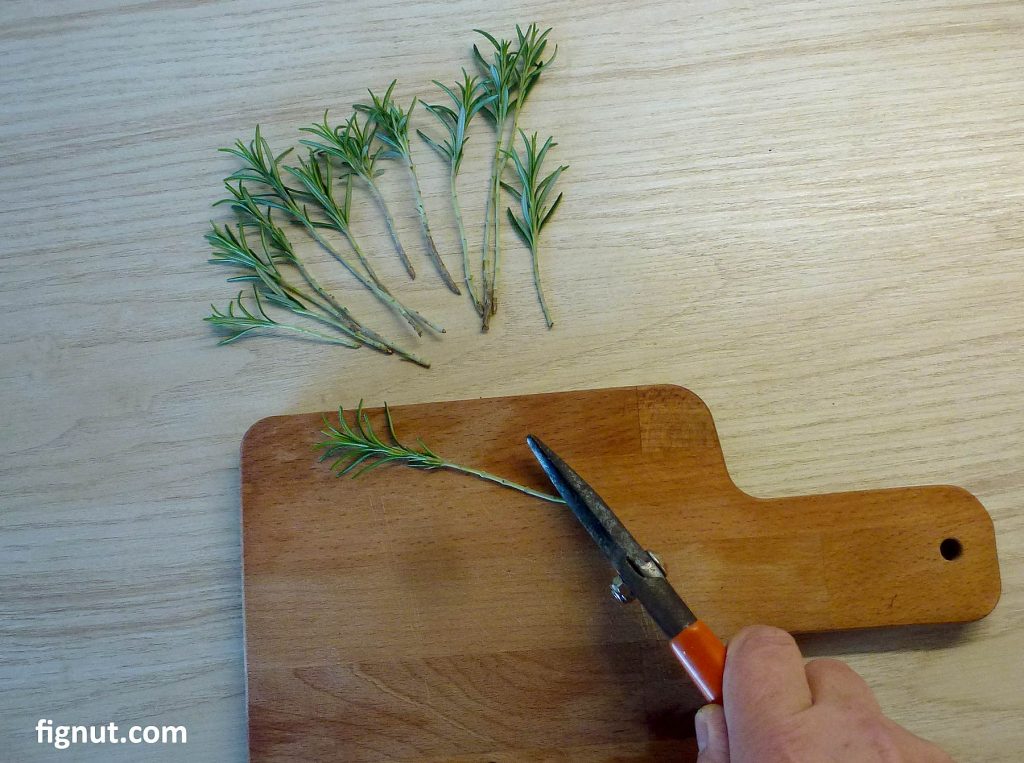
Cut off the bottom part of the stems and apply pressure to flatten the stems. I usually use my pruning shears to apply the pressure, as in the above photo.
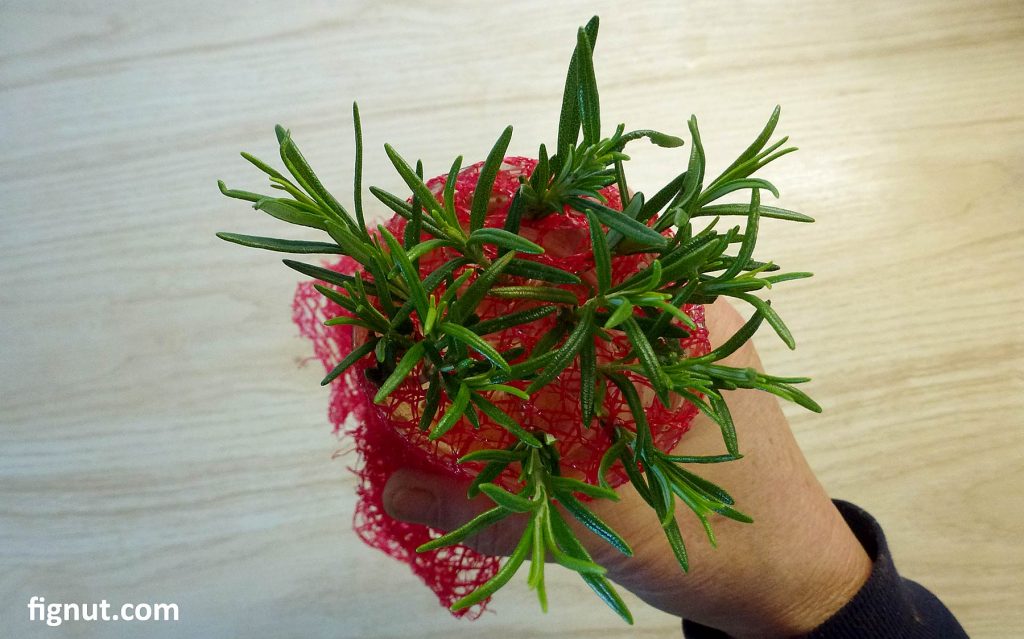
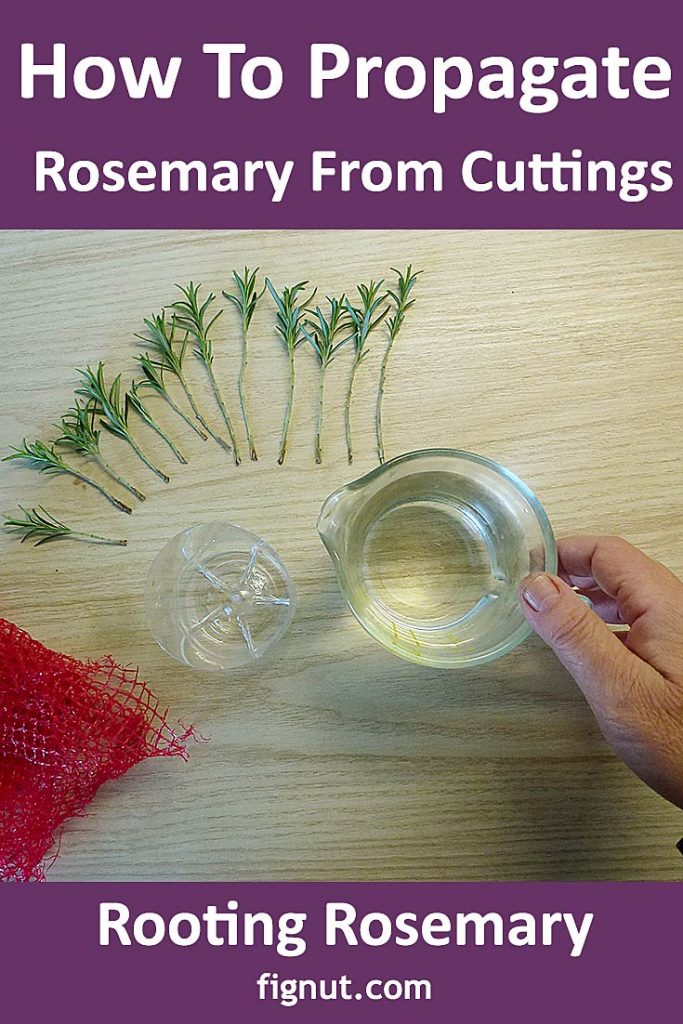
Step 5: Prepare container and plastic mesh
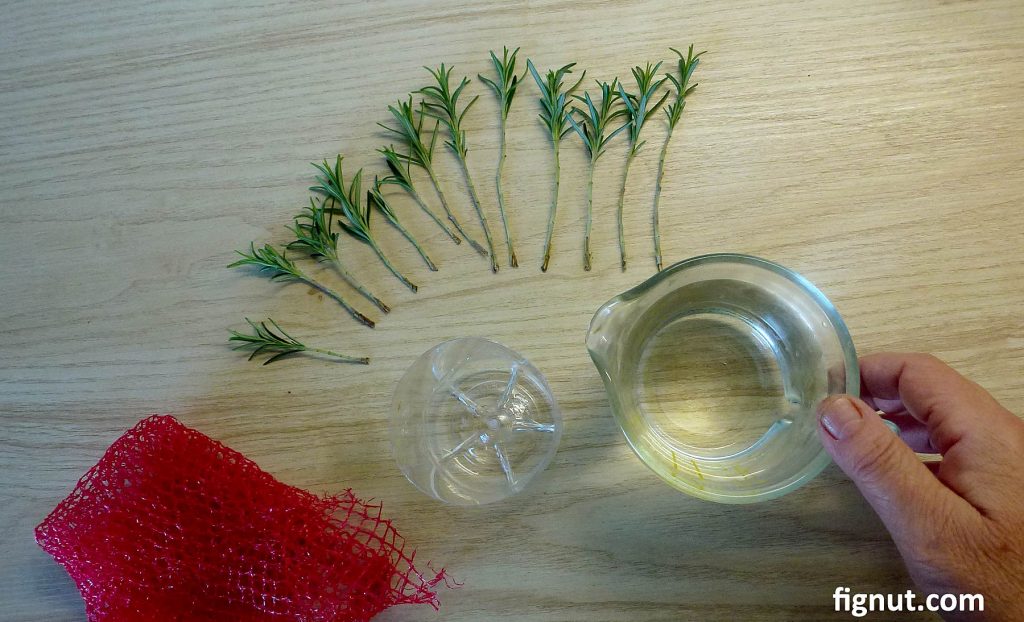
Choose a suitable container and fill it up with water up to 3/4. I usually use small 1/2 liter plastic water bottles cut in half, as in the above photo. Get some plastic mesh (see photo above) – for this purpose, I save potato or fruit packaging mesh and use it as a supporting mesh for the propagation of cuttings in the water.
Step 6: Dip the bottom end of cutting in rooting hormone
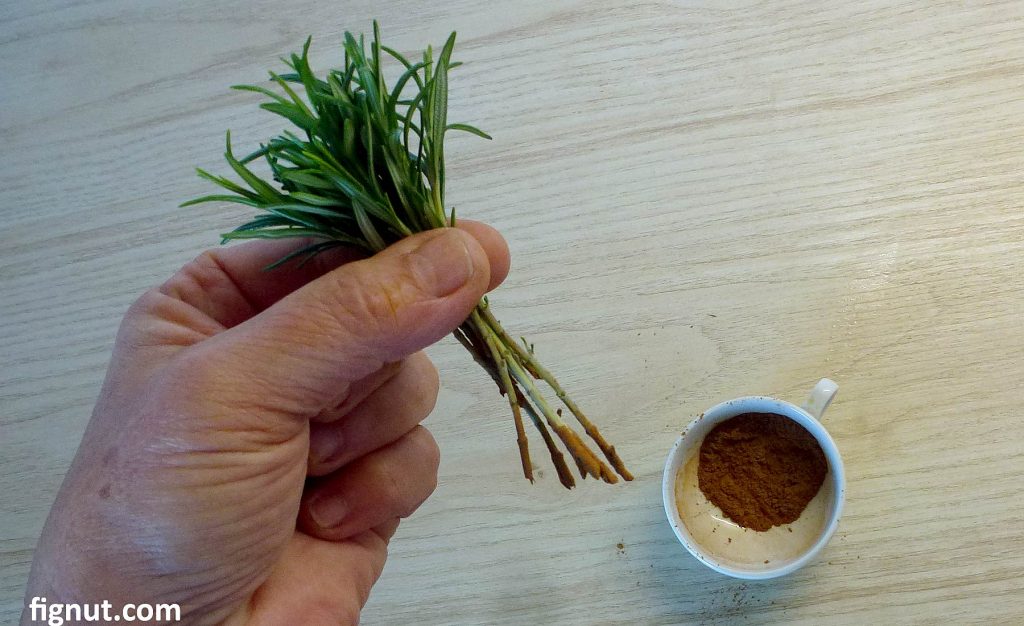
Dip the bottom end of cutting (the flattened part) in rooting hormone. I usually use cinnamon powder as I have plenty of it in my kitchen or I add some of my homemade rooting hormones. This is primarily done as an antiseptic application, to avoid infection or disease developing on the stems.
Step 7: Push each cutting through the mesh

Gently push each cutting through the mesh that is fastened at the top of the plastic container, 3/4 filled with clean water. If you can, use rainwater which you can easily collect on a rainy day from any flat surface in your garden, and save it for this purpose. The purpose of the mesh is to support cutting and keep them at the same level above the water. Here is how it should look:
Step 8: Place the container near the window
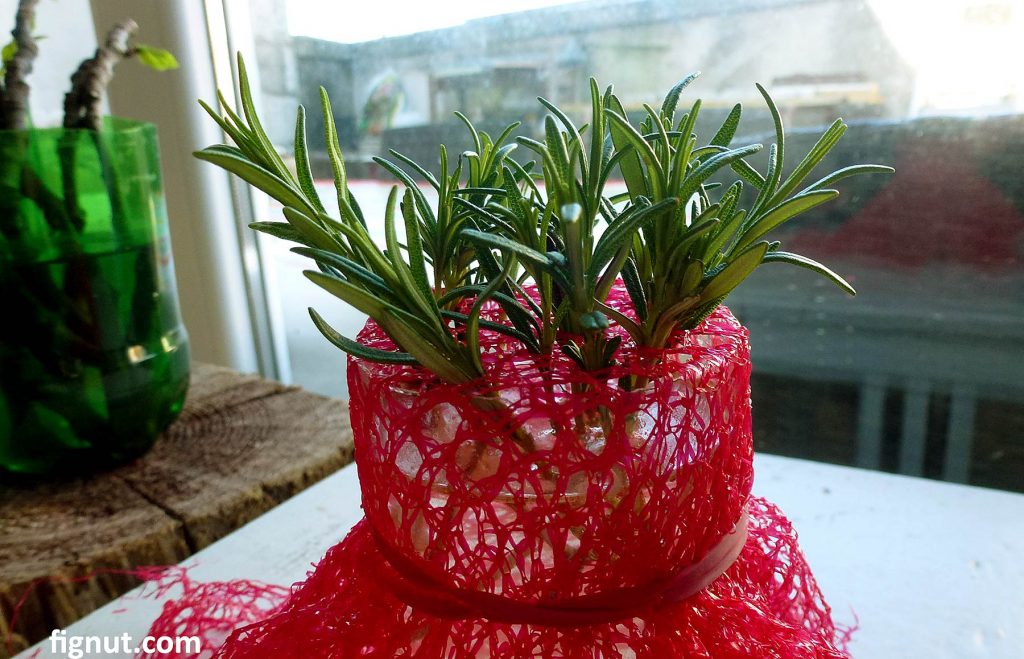
Place the container with properly arranged cuttings indoors, in a warm but not hot nor humid room. The ideal position is near the window that faces north/east. Avoid direct sunlight and low temperatures.
Here is how the bottom of stems should look in the water:
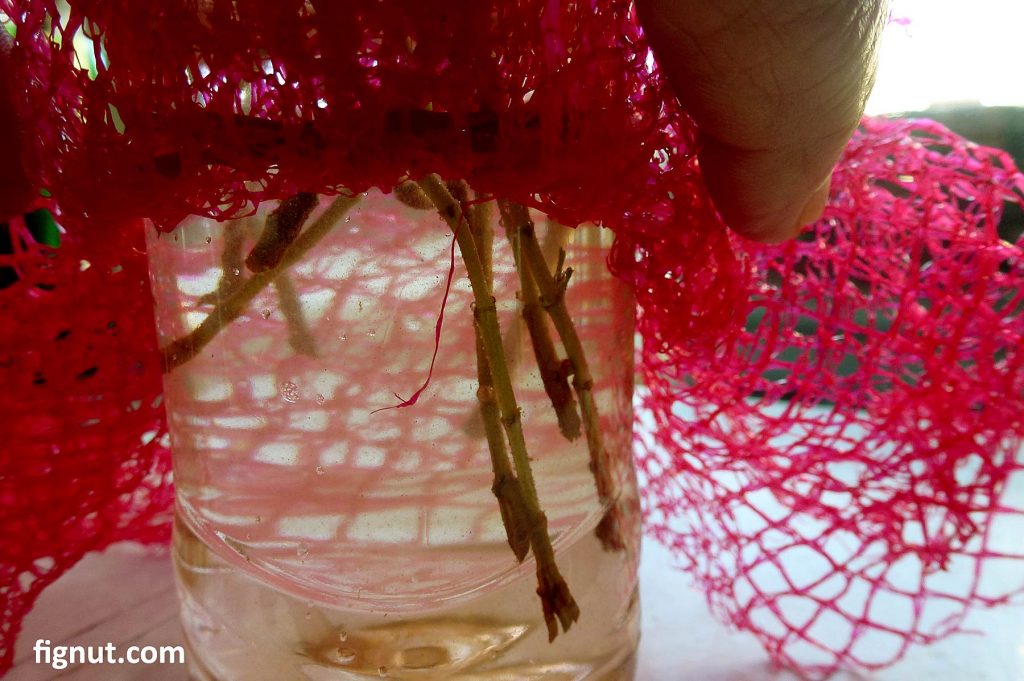
Step 9: Monitor and change water twice a week
This is an important step – change the water twice a week to ensure stems get plenty of oxygen. Make sure cuttings have enough space to develop their roots. You can use several containers to spread your cuttings if you think they are too squeezed.
Depending of the room temperature and other micro conditions of your room, in 6 to 8 weeks you should see some roots developing.
Video – Rooting rosemary cuttings in water in winter
Here is a first video of the process. I will post the update video in 6-8 weeks when roots emerge:

Stay tuned for update video.
Once the roots emerge, the following steps will be to start with planting – pot up the stem cuttings which should be done once the roots developed. I will post here photos and describe the process too.
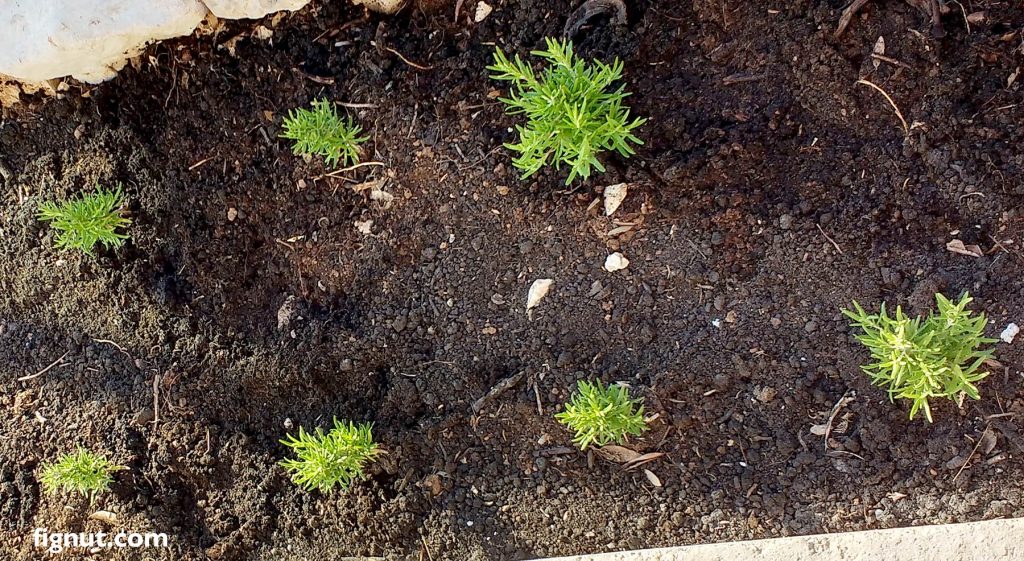
My rosemary plants that are grown from cuttings
Here is a photo of my baby rosemary plants that I grew from cuttings and a photo of the same plants a few years later when they have grown to a mature bush:

See more photos and videos of my rosemary plants
To Conclude
As you can see from this video and article, propagating new rosemary plants from cuttings is an easy process, low-cost, and very economical – you don’t have to spend any money on it. You don’t need any rooting hormones nor fertilizers, except the homemade ones which you already have in your kitchen. Use the free plastic water bottles or pots to continue with and to expand your plant production. If you live in a mild climate, with no winter frosts, you can also propagate your rosemary directly in the ground – start in early spring and just keep watering it thoroughly.
Check more articles about rooting plants