

Reviewed By COLIN SKELLY

Colin is a Horticulturist and Horticultural Consultant with experience in a range of practical and managerial roles across heritage, commercial and public horticulture. He holds the Royal Horticultural Society’s Master of Horticulture award and has a particular interest in horticultural ecology and naturalistic planting for habitat and climate resilience.
IN THIS GUIDE
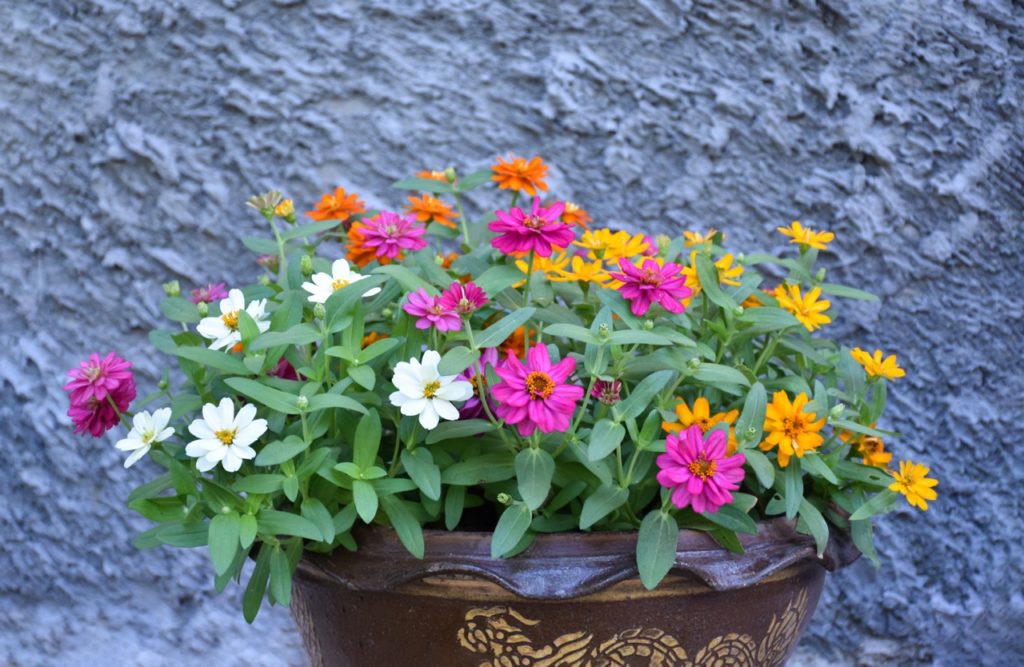
With their bright colours, beautiful blossoms and popularity amongst bees, butterflies and hummingbirds, zinnias are extremely attractive flowers that can brighten up any outdoor border or bed.
What’s more, they’re one of the easiest annuals to coax into impressive blooms and that’s just as true when planting in containers as it is in the ground.
So, if space is at a premium in your garden, potted zinnias might be the answer.
While experienced gardeners should face no problems whatsoever in cultivating zinnias in containers, amateurs might still have a few questions about the process.
Here are eight of my top tips when growing zinnias in pots:
1) Choose Low-Growing Varieties
So can zinnia be grown in pots? The answer is a resounding yes!

All types of zinnia lend themselves to container growing, though you might find that taller varieties can become top-heavy and require staking – or that their root systems can become overcrowded.
To avoid complications, I’d advise seeking out smaller, low-growing varieties of zinnia.
Some good options include Sanvitalia procumbens (Creeping Zinnia), Zinnia elegans, Zinnia marylandica – while the Profusion and Dreamland Series are also good choices.
2) Leave Room For Their Roots!
It’s important to note that zinnias can react negatively to transplantation, so the best course of action would be to plant them directly in the pot you intend to grow for the long term.
They’re not fussy in terms of materials – plastic, terracotta, concrete or indeed any other substance will work well as long as it has adequate drainage holes.
However, size is an important consideration.
Zinnias need room for their roots to develop, so always choose a pot with a minimum depth of 15-20cm.
The width of the pot should be the same for individual plants and bigger for multiple groupings.
Elongated pots are a great option for combining different colours and varieties, but just be sure to leave a 10cm minimum spacing on either side of your seedlings.
3) Use Well-Draining, Slightly Acidic Soil
Zinnias are quite resilient and will cope tolerably well in almost any type of soil, as long as it drains sufficiently.
Having said that, they will perform better when the growing medium has rich organic content and is slightly on the acidic side, with a pH level of between 5.5-7.5.

If you’re using soil you’ve taken from the garden, you can boost its drainage properties by adding perlite mix.
You can also enrich it with aged compost, which will infuse the pot with the nutrients that the plant needs to really thrive.
4) Grow From Seed To Avoid Transplantation
Zinnias are generally grown from seeds, which are thankfully quite large and easy to handle.
If you’re planning to position your potted zinnias outdoors, begin the sowing process (indoors) around 6 weeks before the last frost.
This will give them enough time to establish themselves indoors.
If they’re going to stay inside indefinitely, you can start them at any time.
Fill your container with the soil mix mentioned above, leaving a few centimetres free at the top.

Sprinkle a handful of seeds onto the soil and cover them with a little more soil.
Water the top of the soil lightly so that it’s moist but not saturated.
Bear in mind that potted zinnias started indoors will germinate far more quickly than those planted outside in the ground.
Even just a few days after sowing you might begin to see sprouts emerge.
As soon as this happens, remove the plastic film and move the pot to a location where it will receive ample sunlight (at least 6 hours per day).

This could be a sunny windowsill, balcony or conservatory.
Once the seedlings have 2 true leaves apiece, thin them out and keep only the healthiest-looking plants.
If moving outdoors, it’s a good idea to do so in stages so that the sudden change in temperature and climate doesn’t shock your young plants to death.
For example, you could move it to a shadier spot indoors first to acclimatise it to lower temperatures.
5) Leave A Gap Between Plants
As mentioned above, a good rule of thumb is to allow 10cm on either side of your seedlings so that the roots of the plant have enough space to develop.

As a result, the number of zinnias you can plant per pot will depend entirely on the dimensions of your container.
Many people simply stick to one per pot and achieve fantastic results that way.
6) Keep Well-Watered
It’s important to ensure that the soil serving your potted zinnia never fully dries out, but is never waterlogged either.
Instead, aim to maintain moisture levels at all times.

You can check whether it needs a drink by sticking a finger into the soil and if the top 2-3cm feels dry, it’s definitely thirsty.
Water the soil directly and avoid getting the leaves wet, as this can cause fungal diseases.
7) Add Fertiliser To Pots
For the best results, you can fertilise your zinnia plants with a well-balanced household plant fertiliser, diluted to half its strength.
Products with high phosphorous levels help the plant to process nutrients.
Fertilise 1-2 times a month right through the growing season, but stop altogether as soon as autumn hits.
8) Deadhead To Prolong Flowering
Deadheading is strongly encouraged for zinnias, as this will redirect energy away from the seed pods of the spent blooms and prompt it to produce more flowers.
“Zinnias are one of the few plants that I would deadhead, both because the spent blooms detract from the overall appearance and because flowering will be sustained over a longer period with regular deadheading,” shares Horticultural Consultant Colin Skelly.
When managed appropriately, deadheading can prolong and intensify the blooming season.

It’s also a good idea to prune your zinnia plant if it looks like it’s becoming bushy or overcrowded.
If there’s not enough air circulation between the foliage and the stems, you could run the risk of blight.
As zinnias are annuals, there’s no need to consider overwintering.
You should, however, keep your seeds handy, since you’ll need them to gain a fresh batch of beautiful flowering plants the following spring.